Wildcat Creek Brick Company

Tuesday, December 30, 2008

Putting bricks to work

My first project for the bricks I am making is a furnace to melt and cast aluminum.


I was able to lay a few courses of brick this morning. This part is for the chimney.


My brick presses continued

I wanted to show all of you better pictures of my brick presses and the quality of brick that I am currently able to make with them.


With the cold weather of winter here in Indiana, I have moved the press work into my old trailer workshop. There I can keep the heat up in the 50 deg range on all but the coldest of days.

My first press makes bricks with the dimensions of L 9" x W 5" x H 2.5" - 4.5". I can alter the height dimension by how much earth mix ( clay, sand, cement, water ) that is poured into the box before compression.


The bricks come out pretty hard but the edges are weak and fragile at first. They must be allowed to set out and cure for a couple of days to gain strength. During that time they are wetted to aid the process. After that they are layed closer together to finish the 7 day cure of the cement in them. The last day or so I apply redwood deck stain to the surface that I intend to have exposed on the outside of my construction. Then they are stacked to finish curing and drying out until I need them for construction.


This is my latest and strongest press. It has closely recreated the brick dimension of my first hydraulic press. Dimensions are L 9" x W 3.5" H 3.5"


Here are some of the first bricks from my third press. I can make bricks with or without a "frog" in them. The block used to make the frog is bolted to the inside of the lid and is removable if needed.


Sunday, December 28, 2008

My brick presses

I have taken my idea from the internet. A brick press named the CINVA ram has been made for many years for poorer countries to help locals make their own bricks. I took this concept and started working on my press.


I had an old 20 ton bottle jack and had an idea that I could make myself a press using it as the force of compression.
These are my first results. Even though they were pressed pretty hard, It needed some refinement
The hydraulic jack press worked, but was slow and hard to load the clay mix into. I went back to start over and make a press closer to the original CINVA ram design.
Success! I have made a strong brick now. After it is pressed it needs to be set aside for about 7 days to cure out. It has a small percentage of cement in its mix to help it harden out more and have some level of waterproofing. During the 7 days, water should be sprayed daily onto the bricks to help with the curing out process. After that they can be allowed to finish drying out.
I decided to make a third press. This one was to recreate the brick I made with the first hydraulic press, but using the CINVA ram lever method of compression intead.
When I get more pictures ready I will show you some of the results of the new press.

Saturday, December 27, 2008

Some brick pics for you

Here are a few pictures I have taken along the way on my brickmaking journey so far.

Wooden brick molds and a wheelbarrow full of clay/sand mix ready for making bricks.

Stacked mud clay bricks drying before firing.
Starting the fire early in the morning. I had my kids helping.
See the glow!
The bricks are actually glowing orange hot!
I cracked a few of the bricks during firing. The iron grating I used got red hot and sagged under the weight of all the bricks.
After firing the bricks had taken on a yellow surface haze. The insides had turned orange and red. I found out later from reading the haze is from calcium in the cement leaching to the surface during wet molding the brick. The red inside is from high temp oxidation during the firing of the iron oxides in the clay dirt I used.

Hello everyone!


Just set this up today. Im hoping some of you out there may find this interesting. Ive been reading on the internet and learning by trial and error ways to make my own bricks.


So far I have made mud bricks out of clay and sand. I have expirimented with some success at adding cement to them to harden them up. That way they can be more waterproof than mud alone would be. I have also tried one time to quick fire some sample bricks I made to see if they would harden up like the real bricks are. I was able to get a fire that was really hot for about twelve hours, but it didnt make them hard. Back to the drawing board there.


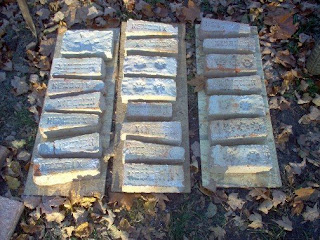
I found descriptions on the web for a 'brick press' that can be used to make a hard brick. I went to work using only photographs for my plans and made myself one. It work out pretty good. So I made another one, then another. It really seems to be the way to go to make a more solid brick. I am making cement hardened bricks for now. But next summer I will try again to 'fire' some of my clay bricks. Well thats it for today. I will keep you posted as I do more.